

After a client has purchased one of your packages and both of you have agreed on a suitable time and date for your appointment, it’s time to schedule it on RingMD.
You can schedule appointments from three locations on your Apple mobile device using RingMD app.
- On the Sessions page
- On your RingMD Calendar
- On Messages
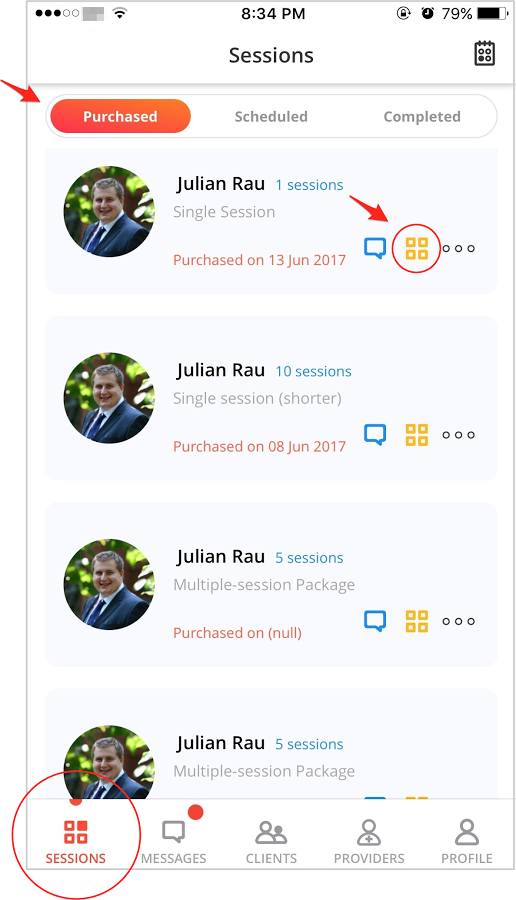
Sessions Page
Step 1: Tap Sessions, the first tab found at the bottom menu bar.
Step 2: Under the Purchased tab, look for the session you’d like to schedule and tap the yellow booking icon.
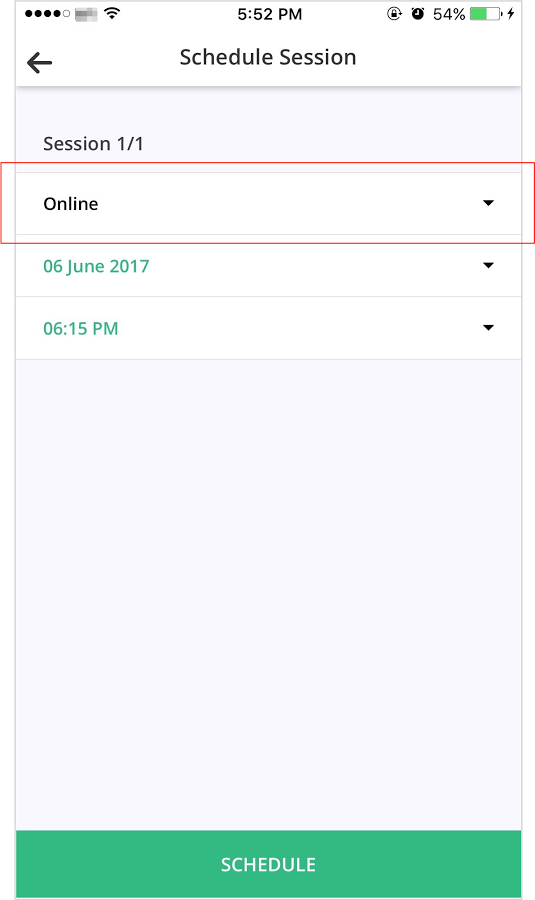
Step 3: Enter the appointment details and tap Schedule.
You will find the scheduled session on the Sessions page, under the Scheduled tab.
Note: If you’re having a in-person appointment, change the Online status on the first field to Offline while scheduling the session.
RingMD Calendar
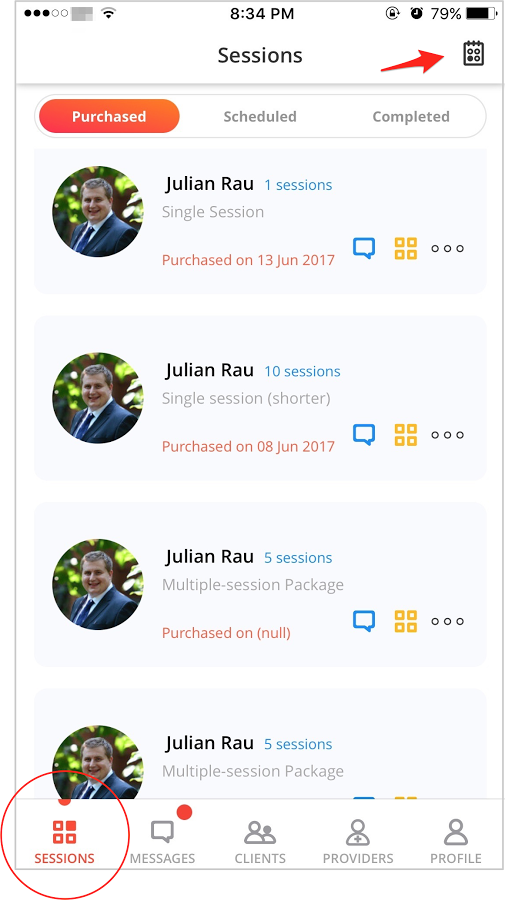
Step 1: On the Sessions page, tap the Calendar icon on the top-right corner.
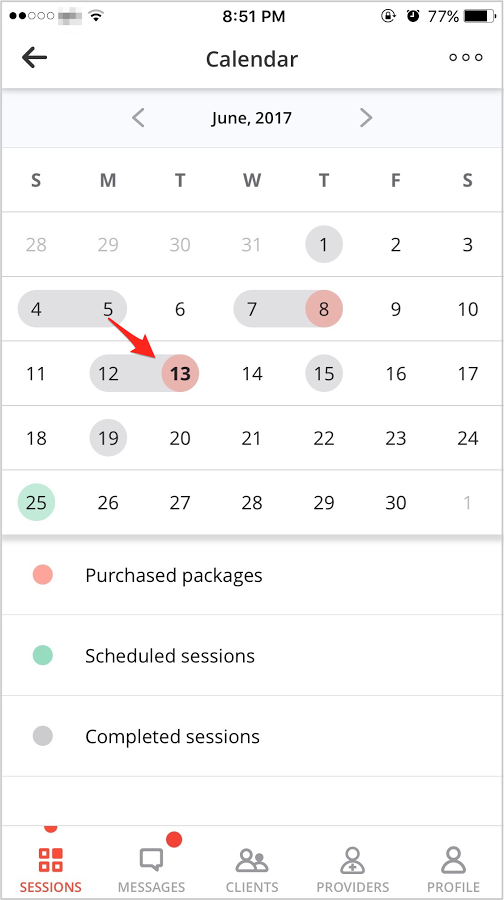
On the calendar, newly purchased sessions are highlighted as red and are called Purchased Packages. These packages have yet to be scheduled.
Step 2: Tap the date where you see the session you’d like to schedule.
Step 3: You will be directed to the Day view. Look for the session and tap it.

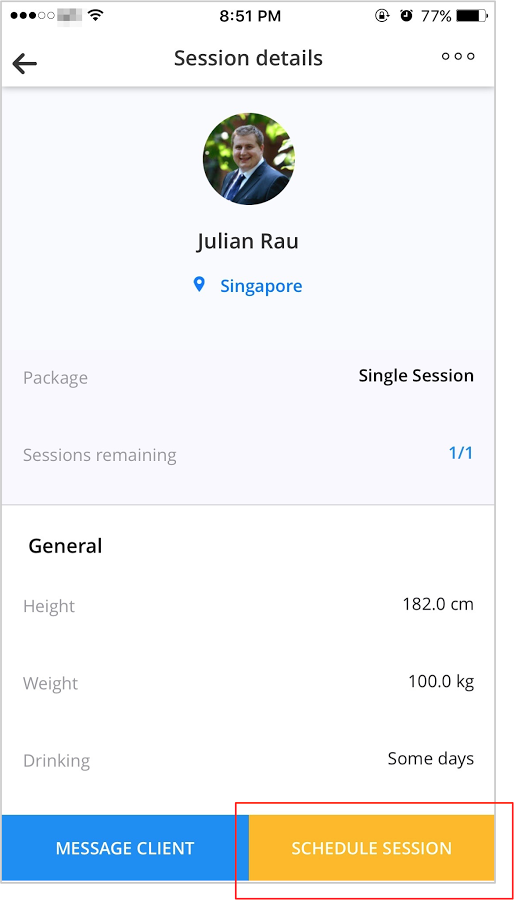
Step 4: You will be directed to the Session details page. Tap Schedule Session.
Step 5: Enter the appointment details and tap the Schedule tab.
Messages
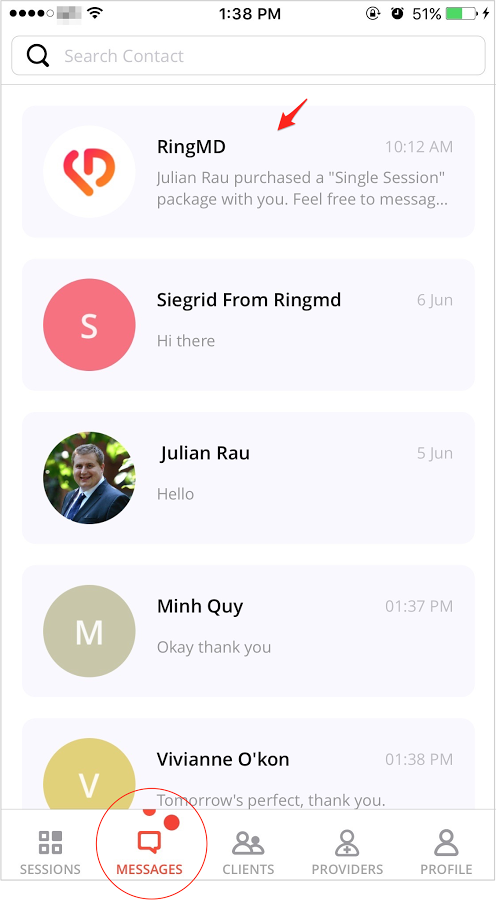
Step 1: Tap Messages, the second tab found at the bottom menu bar.
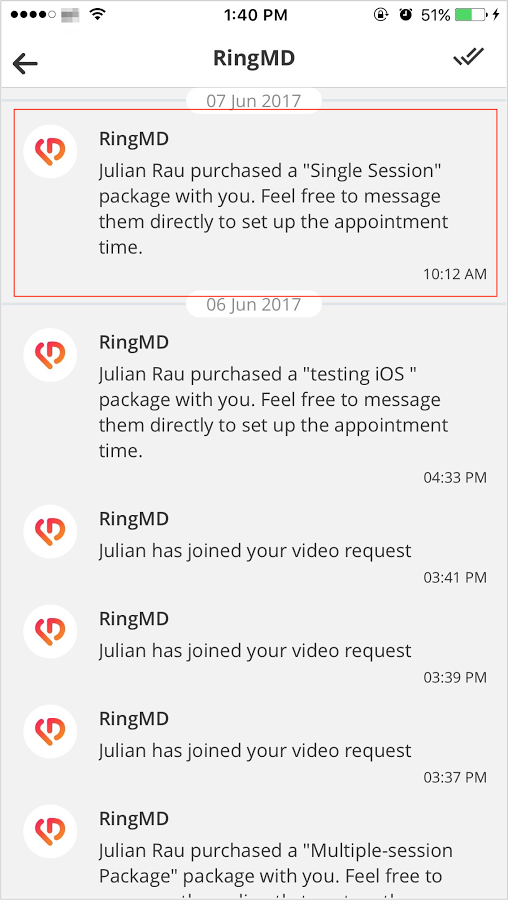
Step 2: Tap the message that says your client has purchased your package.
Step 3: You will be led to the Notifications page. Tap the notification.
Step 4: You will be directed to the Session details page. Schedule by tapping Schedule Session.
Step 5: Enter the appointment details and tap Schedule.
|
Related: |
Please help us improve this article by leaving feedback below.
Comments
0 comments
Please sign in to leave a comment.