

If it is time for your online session with your client, and you want to connect via a video call on RingMD, follow these steps.
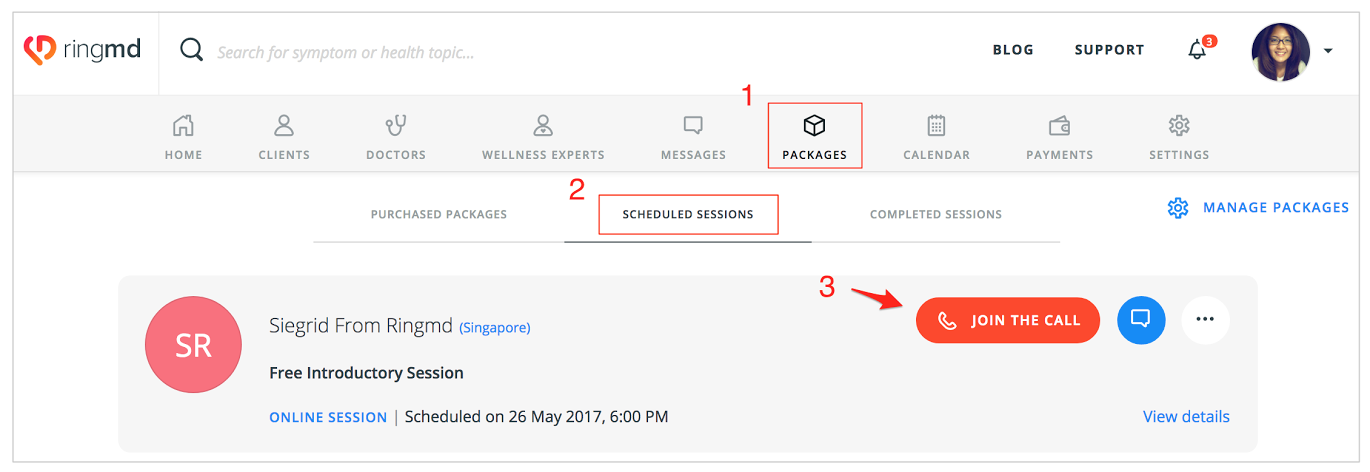
Step 1: Click Packages on the top bar menu.
Step 2: Click the Scheduled Sessions tab.
Step 3: Look for the appointment and click Join the call.
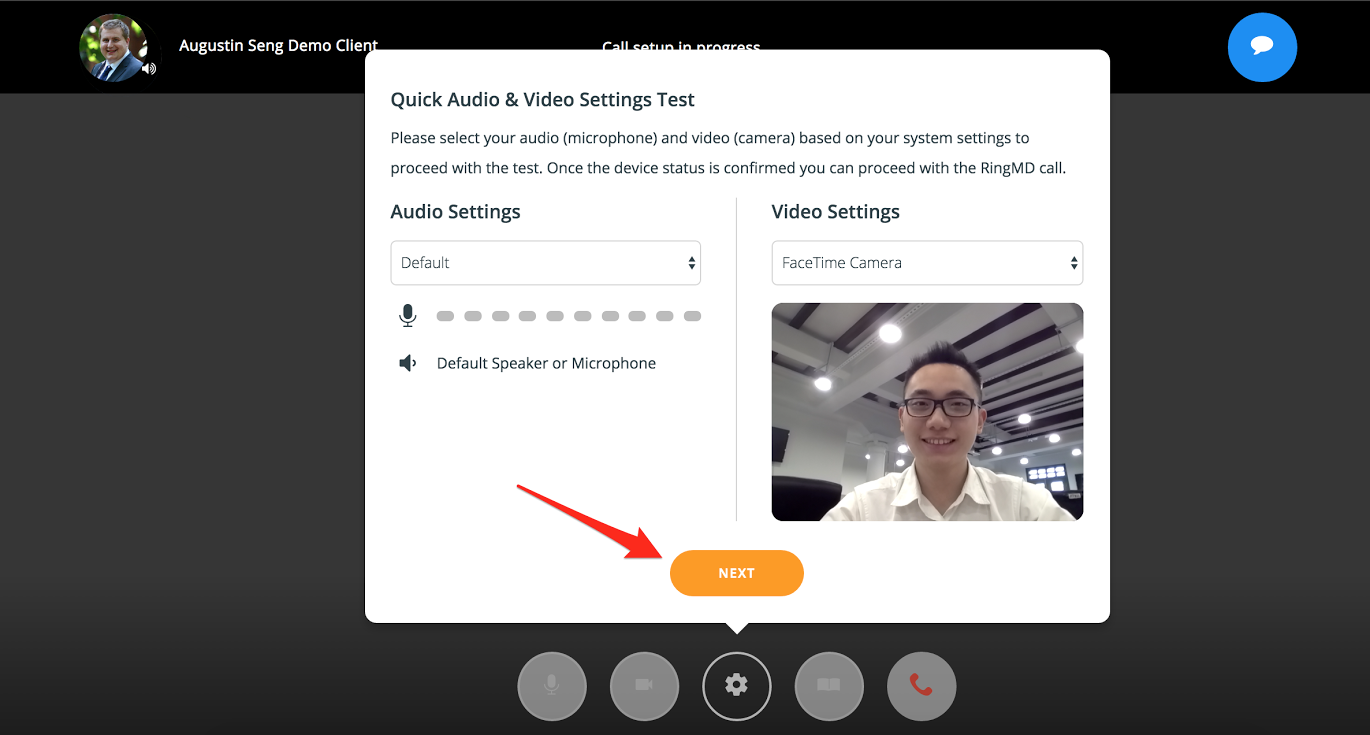
Before entering the call, you will be directed to the Quick Audio and Video Settings Test.
Step 4: Select your audio and video settings and click Next.
Step 5: At this point, we will check if your internet connection is stable enough to support your microphone and video camera. Click Proceed to call when the green bars are filled up and you see Excellent.
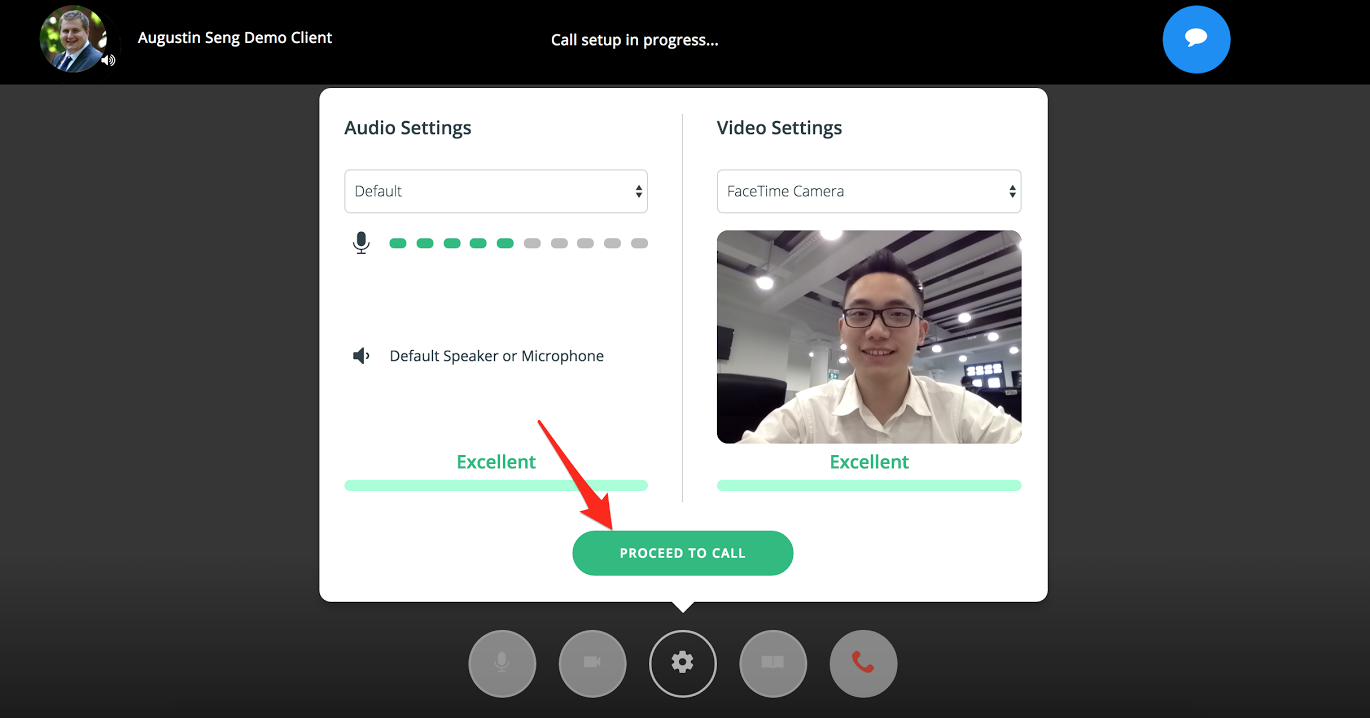
Note: If the green bar doesn’t fill up and ‘Excellent’ fails to show, you can refresh the browser and try the pre-call test again. If you have a poor internet connection, you might want to connect to a different network or ensure that you have a strong Wi-Fi signal.
Step 6: Start speaking with your client.
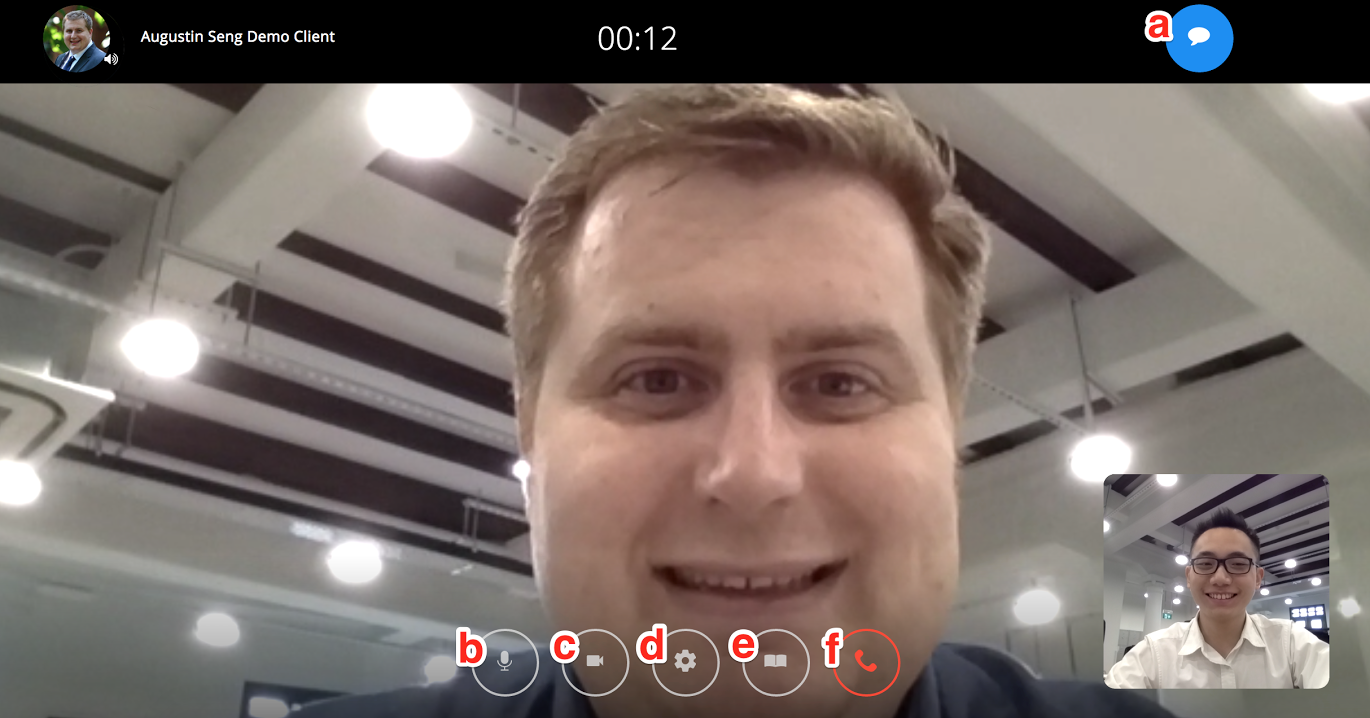
Explanation of the function of all the icons on the video call screen:
a. Enables you to send messages with your client during the call and view past messages
b. Enables/disables your microphone
c. Enables/disables your video camera
d. Shows your audio and video settings
e. Opens up a box for you to type in notes that are only viewable by you
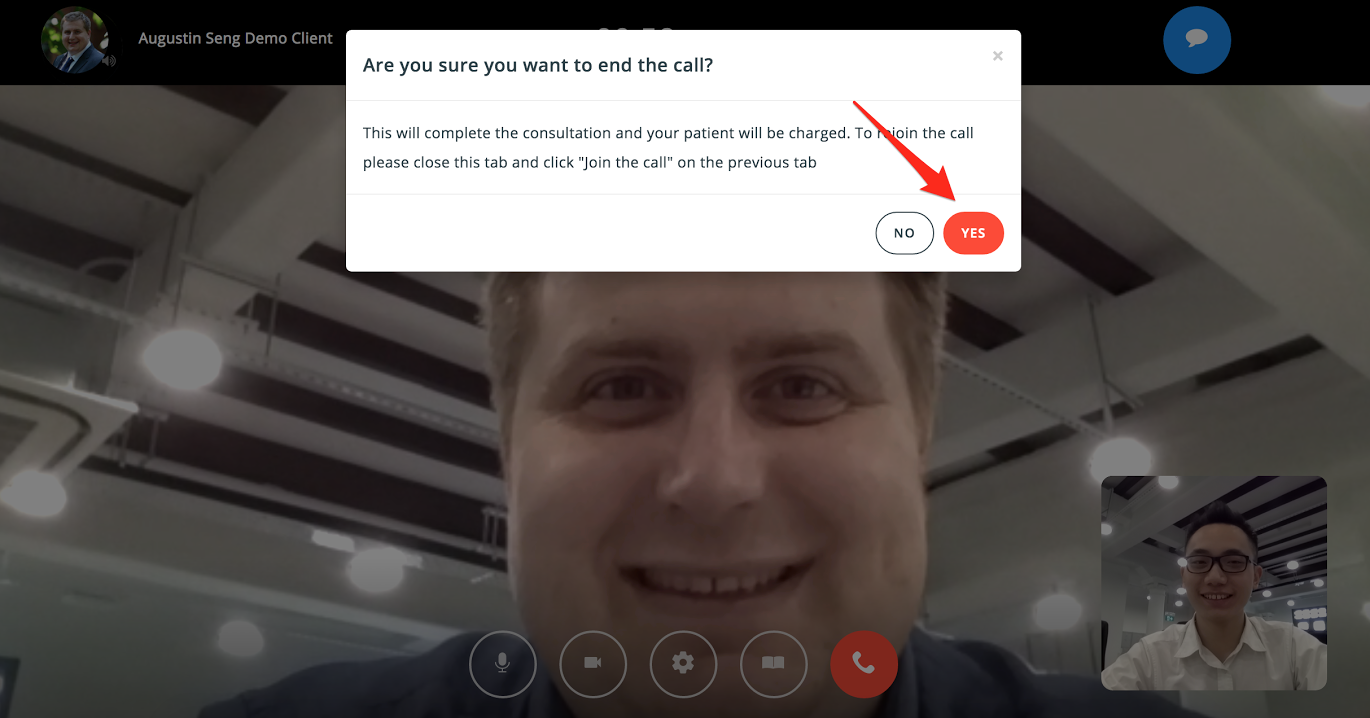
f. Ends the call
Note: You will not be able to re-enter the call once you end the call via (f). Clicking the end-call icon officially completes your session with the client.
Step 7: When you’re done with the call, click the end-call icon. Remember to click Yes to end the video call.
Note: If you experience a technical issue and would like to reset the call, simply close the tab of the video and click Join the call again, or simply refresh the video call tab.
Start your video call on RingMD now!
Please help us improve this article by leaving feedback below.
Comments
0 comments
Please sign in to leave a comment.